Thursday, November 26, 2015

5 Realities of Being a Lifestyler

I've mentioned this before, but I consider myself to be a lifestyle Lolita. This means that I work the fashion into my everyday life as much as possible. Sometimes it's easy, sometimes it's not, and sometimes it's quite shocking, so here is a list of some of the things you'll deal with being a lifestyler.


1. It's Takes Dedication


Being a lifestyle Lolita requires a lot of dedication. It means completely revamping your wardrobe. I own exactly two pairs of pants. Both are yoga pants, and one pair is splattered with paint, which I only wear when I'm painting furniture for my room (more on this later). Everyone has days where they don't want to do anything but lounge around in their pajamas. As a lifestyler, my pajamas consist of cute lingerie nighties and bloomers.

And soon, winter PJs
But working in the fashion into just your closet does not a lifestyler make. I also have quite a few hobbies that I try to devote time to. I've learned French, and I'm also starting to study Japanese. I sew quite often. I collect teapots, make videos, and run a blog. I do various crafts, and make plushies.

To be fair, a few of these things (notably sewing) I did before I got into Lolita, but the other hobbies are ones that the fashion has led me to.


2. People Won't Understand


I'm quite lucky because my best friend (and roommate) is a Lolita as well. We share a closet and accessories, and it's pretty much the best set up ever. But my family doesn't understand why I dress the way I do, and often make fun of me for it, even while saying that I look nice.

My mom (who has gotten better at being accepting) will sometimes say "let's go to the store--but don't wear that Lolita stuff," even knowing that 90% of my closet is made up of it.

My extended family--the people I grew up with--accept it with "well, you've always been weird," or "remember that phase you went through...."

Strangers on the street seem to be more accepting of it, particularly older ladies who are excited to see fashions similar to what they wore when they were younger. Still, there will always be that one guy (and it usually is a guy) who harasses you, or yells 'insults.'

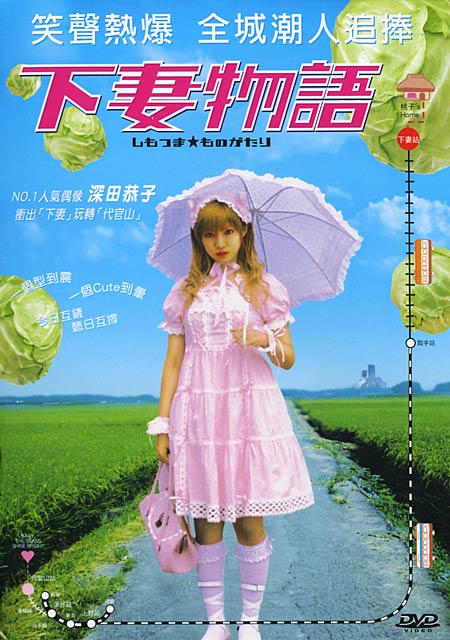
Call me Bo Peep one more time. See what happens.
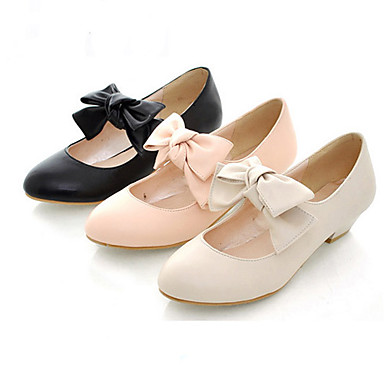

3. It's Expensive


Even if you only wear offbrand or handmade, Lolita is expensive. There are countless discussions online about how Lolita is comparable to high fashion brands in the US, but the point remains that for someone who has shopped at thrift stores for most of their life, Lolita will be a shock.

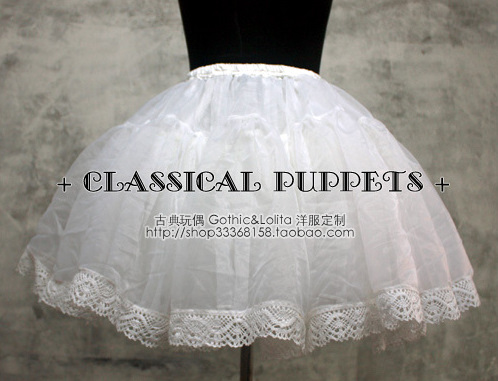
by everydayfrills.tumblr.com
After a few years in the fashion, your expectations will adjust and you'll find yourself saying "$100 for a Baby dress? Steal!" instead of "that's hilarious." However, it will still require saving unless you have a particularly high paying job.

That's only for the fashion portion, too. If you want to be a lifestyler, you're going to want to make your room (at least) match your aesthetic. And finding cute, cheap furniture is difficult. I'm still saving up for new curtains, a bedset, and a loft bed (which I will be making myself). I've already gotten new carpet, cute storage containers, and a wall-mounted closet.

The cheapest way to make your room look the way you want is to give your furniture a makeover with a new paint job. Make sure to wear that one pair of pants you saved when you do this. Or make it yourself.
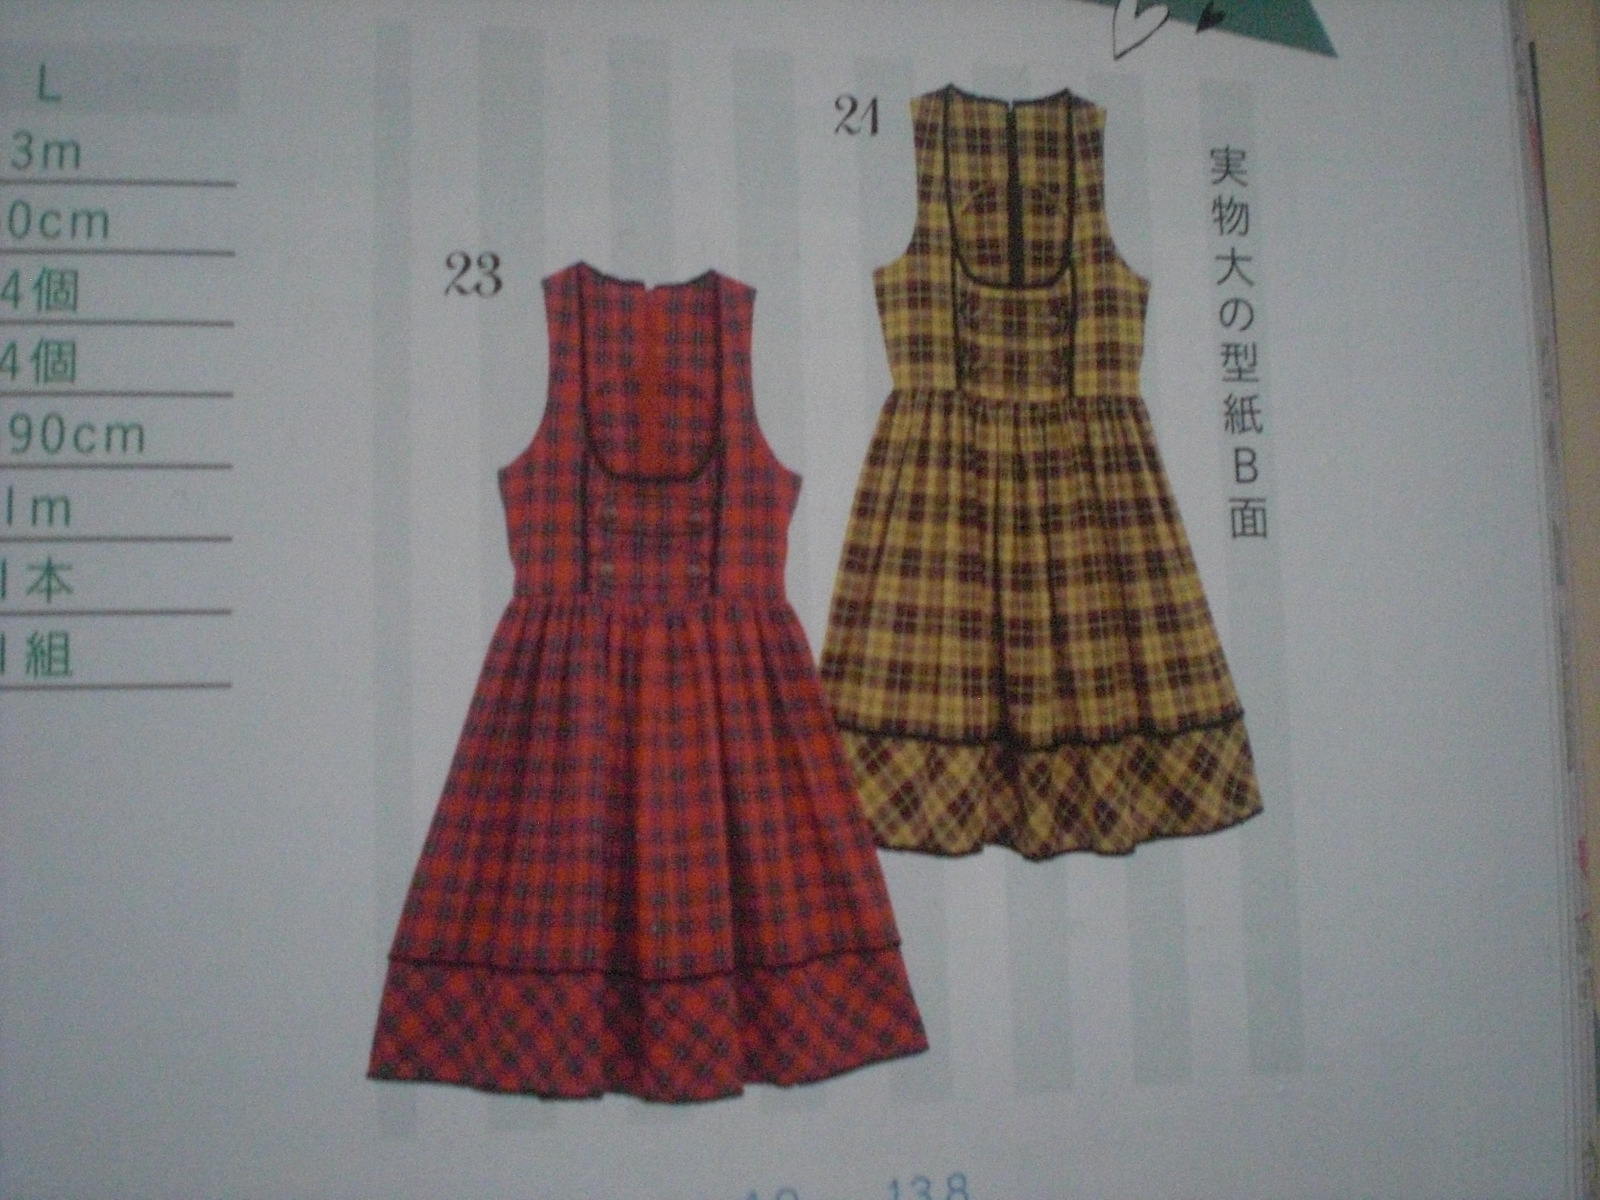

4. It Takes Time


In every way imaginable, being a lifestyle Lolita will take a lot of time. From getting ready to leave the house, to building up your wardrobe enough to wear Lolita every day, to researching and buying or making your clothes. Lolita takes time.

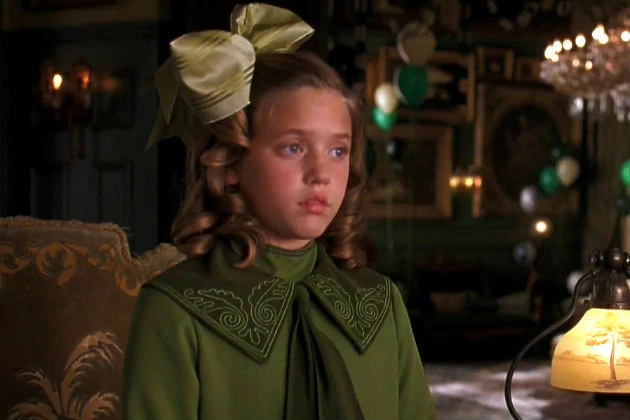
This isn't a bad thing. While you do this, you'll find things out about yourself. Maybe that you actually like A-line dresses better than bells, or classic better than sweet. Maybe that you're actually pretty good at making accessories even if you kind of suck at sewing, or that green looks better on you than you thought.


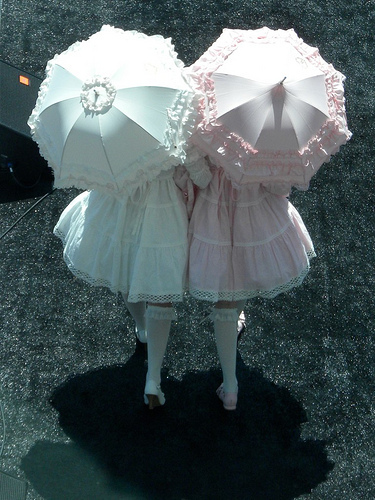
5. It's Totally Worth It


This is just my opinion, of course, but I think it's completely worth it. I've gained a ton of confidence because of Lolita fashion, and I'm much happier with myself as a result. I've learned a bunch of skills, I've gained plenty of lovely friends who I have a lot in common with, and I have a conversation starter with pretty much anyone at anytime. 

Friends!
I enjoy myself when I'm writing about Lolita, or sewing a dress, or getting ready to go and hang out with my frilly friends. I have fun when I'm walking down the street in a pretty dress, looking like I've stepped out of a fairy tale. I've discovered tons of hobbies, and have new goals for how to make myself happy. 

Best friends!
So while being a lifestyle is a lot of time and effort and money, I wouldn't give it up for anything. 

Also this happened
What do you guys think? Are you a lifestyler? Why or why not? Do these things hold true for you, or is it just me?

Tuesday, November 24, 2015

Lolita 52 Challenge: #4 - Favorite thing to put on my head

This one is laughably easy. Hats, of course! I adore hats of all styles, colors, and sizes. I have a face (or a head?) that works with pretty much any hat, which certainly helps. I actually want to get into millinery eventually, but at the moment I don't have enough money to invest in getting hat blocks and things.

I do have materials for making fascinators, but it's something I haven't gotten around to just yet. My to-do list of crafts and sewing is so ridiculously long it hurts to think about.

All of the hats I have are from vintage or thrift stores, and the most expensive one was $10. My best friend got me this hatbox as a Halloween gift (I love Halloween), and it's super sturdy and lovely and useful.


I made a hatbox myself and, although it isn't super pretty it protects my hats. I really want to get a bunch of pretty hatboxes for storage, though.

Here are my collection of beige-y hats. As a classic Lolita, you can never have too many. Creams, off-whites, and ivorys are super easy to match, and if you want to bring in some extra color you can change out the ribbons or add some nice flower clips along the sides.


My fanciest hat is a wedding hat a friend bought for me from Goodwill for about $7. It has beautiful beadwork and a soft tulle train. The brim is nice and wide, and it looks super cute on the underside too. The only problem with this hat is that the fabric is satin-y, which can be frowned upon in this fashion, but I don't mind.


So pretty
And here are the rest of my hats:


The green one is my absolute favorite. The feather is something I added to make some brown fit better in a coordinate, but it's easy to remove. I got this hat for $3 at a little vintage shop. It's velvet and has pearls and green netting and I absolutely adore it.


I would really like to get my hands on some Mary Magdalene hats. I've accepted the fact that accessories are the only thing of MM's that I'll be able to wear, but it's all still so expensive. I particularly love the style of this one:


I think that about wraps it up for this post. What do you guys think of hats in Lolita fashion? Yay or nay?

Monday, November 23, 2015

Lolita 52 Challenge: #3 - What my own Lolita lifestyle is like

Hmm... This prompt is a little open-ended...

I consider myself a 'lifestyle lolita,' because 1) the majority of my closet is Lolita; 2) whenever I go out I tend to wear Lolita; and 3) I try to incorporate Lolita activities and aesthetics into other aspects of my life.

I work from home, so this is much easier for me now than it was when I was working at places that had a uniform or dress code. I don't really incorporate Lolita into my eating habits, mostly because I can't bake or cook all that well.

But I have a nicely sized closet:


A small but close-knit local community (we have meet-ups at least once a month):


An Etsy store where I sell the things I make.

A cute-ish room (I'm working on the styling; I'll be doing a room tour video when it's done).

A Youtube where I talk about Lolita:


And a best friend/roommate who is also a Lolita:


I also collect tea cups and tea pots ( my collection is small because I've only just started):


In general, I'm pretty happy with how much Lolita is incorporated into my life. What I'd really like to do is work more on selling Lolita clothes, and then I think it would be perfect.

Thursday, November 19, 2015

Lolita 52 Challenge: #2 - 5 movies for Lolitas

I'm not super into movies unless it's in the horror genre, but here I go anyway...

1) Kamikaze Girls

Did you really think a movie list for Lolita's wouldn't include this movie? Come on. Where would Lolita be without Kamikaze Girls?

2) Marie Antoinette

I wasn't too into this movie as far as story goes. It kind of drags on and is a bit boring, but the visuals are more than enough to keep me interested. The costume design is just lovely.

3) A Little Princess

This is a super cute, family-friendly movie about how all girls are princesses. I adore this movie. It's fun and sad in turns, and the costuming is very nice.

4) Sleepy Hollow

Here's a movie that's much more my speed. It's funny and dark, and has plenty of lovely dresses. It also stars Christina Ricci, who is, was, and will forever be my favorite Wednesday Addams.

5) Alice in Wonderland (any of them)


Pretty much any version of Alice in Wonderland can go with Lolita, but my personal favorites are Sci-Fi's Alice (because I have a huge crush on Andrew Lee Potts) and Tim Burton's version.

Look at that face

Wednesday, November 18, 2015

Lolita 52 Challenge: #1 - 5 pieces that every Lolita wardrobe should have

I've decided to start this challenge, because I think it will be fun! I'm just going to go in order, and I might skip a few that either don't relate to me or just aren't that interesting, but I'll try to do as many as I can. So, without further ado...

5 pieces that every Lolita wardrobe should have, regardless of style

       1) A bell shaped Petticoat

Petticoats are the lifeblood of Lolita fashion, and the bell petti is easily the most versatile. Even if you're a classic Lolita, a good portion of the dresses you'll buy will either be made for a bell petti or can be paired with one anyway. 

I'd recommend getting a petti that's either around $50 or so, or buying a couple cheaper ones that you can layer, if you want varied amounts of poof.

       2) Versatile, comfortable shoes

You can never have too many shoes, but unfortunately Lolita shoes can be pretty expensive. Look up a bunch of reviews for shoes you're thinking of buying and compare how comfortable they're supposed to be. Also, size up! If you need to, you can use insoles or stuff the toes with socks. It's better to have more space than less.
Go for a neutral color, like white or black, depending on what substyle you wear the most. Also, look for a low-ish heel.

       3) A versatile bag

I'm a huge fan of versatility, in case you can't tell. I like getting a lot of use out of my items, and I can't do that if they don't match everything! Getting versatile stuff is also really useful when you're first getting into the fashion. So do some googling and find a nice white, black, or cream bag to match your coordinates!

       4) Cotton or fleece-lined tights

Maybe not so much for the Lolitas in super warm climates, but for everyone else, these are a must! Wearing Lolita in cold weather can be a challenge, so having warm legwear is essential. You can't really find printed tights in these fabrics, so solids are your only options. I suggest white or black again. You can get some at Sockdreams.com with free shipping!

Pro-tip: Sometimes you can only find leggings for the fleece option, but worry not! If you have a sewing machine you can just sew the bottom parts closed. It'll be a little bulky, but the fabric is stretchy and you can trim the seams.

       5) A parasol

I used to think parasols were just a giant waste of money, but my opinion has changed greatly. I've recently become worried about aging and getting wrinkles, so my opinion has flipped. A parasol is a perfect way to stay cool in the summer, and it keeps the sun away from your sensitive skin! 

Don't bother with the fabric ones, or the ones that will run if they get wet. What's the point of having (essentially) an umbrella that can't shield you from the rain? Also, you can sometimes get lucky and find ruffly umbrellas at Target or Walmart for super cheap. I have one white parasol from Target that's lasted me about 3 years now!

 So there we have it. Five things your Lolita wardrobe should not be without. 

Friday, November 13, 2015

After Much Deliberation...

I've decided to sell my handmade clothes on Etsy! I've been getting requests to sell my stuff for years now, but I was never confident enough in my abilities. But now that I've been sewing for 9+ years, and have a good understanding of pattern drafting, I think it's time.

I'm working on my first item right now, a blouse from Otome no Sewing 6, sized up. I think my shop will cater towards more heavy-set ladies, because that's what I'm used to making, but I'll have a custom size option available.

Here's what I plan on selling:

  • OPs, JSKs, and skirts
  • aprons
  • bloomers
  • loliable sleep/loungewear
  • blouses and cutsews
  • cardigans and boleros
If you wanna check out my shop, just click this link. I'm super excited!

Saturday, November 7, 2015

Otome no Sewing: Re-sizing Patterns

Before you begin, be aware that this tutorial involves a great deal of math. It can seem pretty overwhelming at first, but take everything step-by-step and you shouldn't have a problem. And use your calculator!

So Otome no Sewing is a thing. A great thing, in my opinion. At the time of writing there are 7 books out, each with a number of awesome patterns ranging from accessories to coats to dresses and skirts. The books are in Japanese, but they have very detailed pictures illustrating how to create the pieces. I personally own four of these books despite not fitting the measurements for the patterns.

A thing.
You can purchase Otome no Sewing books on Amazon for anywhere between $10-$30 depending on which one you're trying to get. They're great for inspiration and should not be overlooked by the plus sized Lolita for a very simple reason: you can make the patterns bigger.

As an example, I used the pattern for this dress:


to make this:

It only took about a day to make, too! So how did I do this? And how can you? Well, you could grade it up, which involves lots of cutting, or you could try drafting your own pattern using percentages. For this tutorial, I'm going to be making this pattern the proper size for me, but you can take the equation and apply it to any of the patterns:


You actually don't even need to remove the patterns from the book. The Otome no Sewing books come with a helpful little sizing guide, and each pattern has little drawings of the pattern pieces with their measurements next to them. So we're going to use these two things to help us draft our own pattern.

Note: this method will also work with sizing down.

ANOTHER NOTE: The short version of this tutorial is: draft your own pattern by turning the original pieces into percentages and plug in your own measurements to get the right size. ONLY do this for the horizontal measurements (i.e. bust, waist, hip, etc.), unless you want your garment to sit higher or lower on your body. This can be done for any pattern in the Otome no Sewing books.

The size chart.

Here is the pattern piece diagram. See all those little numbers? Those are what we're going to be using. It looks a little complicated, but don't panic. We're going to start with the front bodice. Specifically the middle piece (the little one on the left). 


Before we truly begin, let's talk about ease. Garment ease allows you to breathe and move properly, and it's very important. But because we're going to be increasing this patterns with percentages, that ease is going to increase too. We don't want that. So what we're going to do is:

  1. Add the total measurements from the image for the bust together, and add the total measurements of the waist together. This gives us 49cm for the bust and and 39.5cm for the waist. Because this is for only half a pattern, we need to multiply it by two. That gives us 98cm and 79cm for a pattern meant for an 88cm bust and 70cm waist! That amount of ease being increased? That just won't do.
  2. Count the number of pattern pieces in total. For this dress it's 7. Now divide the ease (10 and 9) by the pattern pieces (7). That gives us 1.4cm for the bust and 1.2cm for the waist, which is how much ease is in each pattern piece. 
  3. Now when you draft your pattern piece, subtract 1.4 or 1.2 from the pattern piece measurement in the book before you begin using your equation.
  4. But wait! We want some ease, don't we? Otherwise we won't be able to move around at all! So figure out how much ease you want your garment to have (I usually like 5cm or ). Divide this number by the number of pieces in the pattern. 
  5. THIS NUMBER WILL BE REFERRED TO AS Z OR Zcm FROM HERE ON OUT. You're going to be adding this to your pattern pieces as you go.

This  first piece will be cut on the fold, so we're going to take our dressmaker's paper and start plotting from the edge. The first thing we look at is how tall the piece is. We're going to be using the largest measurement here, which is 16.5cm.

A Note About Length: Because your boobs are likely to be bigger than the ones the pattern is made for, you'll have to add a bit of length to make sure it reaches your natural waist. I usually add 1/4 to 1 inch, depending on where exactly I want it to sit. To find out how long it should be, measure from where a shoulder seam usually sits on your body, over your boob, and down to your natural waist. Add this measurement to the length measurements as you go. In this tutorial, I'm skipping this step for simplicity.

Now we're going to look at how wide this is--starting from the top. The largest measurement is 8.4cm, and this is at the bust line. So we need to figure out what the percentage of the bust this is. So we take 8.4, subtract 1.4, and divide it by 88 (the bust measurement), which gives us .079.

Now what we need to do is take our own bust measurement (mine is 102cm) and multiply it by .0079 (which gives me 8.1). Add your new ease (Z).

So the equation here is: (pattern measurement - original ease) / original measurement = Y. (Your measurement * Y) + new ease = new pattern measurement.

When trying to figure out where to place a dart or how much to take away from a piece, disregard the ease portions of the equations. This will be mentioned a few times in this tutorial.

Measure perpendicular to the center and make a mark.

Now we do the same thing for the bottom piece, but replace the bust measurement with the waist measurement. So (8-1.2) / 70 = .097. .097 * 83 = 8.1. But remember, we need to add our new ease! Add Zcm. So I will make a mark 8.1 +Zcm (or 8.8 for myself, if you're curious) from the edge. Connect your two points. 

Now bring down the top edge point 1cm. On the bust line (use your equation, but disregard the ease (1.5/88*your bust=X)), mark Xcm away from the corner. Draw a mostly straight line from the  center front point and gently curve it to the other point. There will be a gap between the points along the bust line.


Congratulations! Your first pattern piece is almost complete. Label it and move on to the next one.

Now we'll be drafting the side piece (not the little one). 


Since the bust line altogether is 25.5, we want to subtract 8.4 (the width of our first piece), which leaves us with 16.1. Subtract 1.4. Now we divide this by the book's bust measurement (88), which gives us .167. Multiply this by your own bust measurement. This gives me 17. Add your new ease. Draw a line perpendicular to the center edge, from the front pattern piece.

From the bust line, measure down (perpendicular!) 16.5cm and make a mark. Now we need to know how far to pull the waist in (don't bother with the subtraction or adding Z here; ease isn't an issue), so take 2 / 70 = .028. Then multiply it by your waist measurement. So, for me, it's .028 * 83 = 2.37. So I will plot a point 2.4cm in from the front pattern piece.

Referring back to the image in the book, we can find that the waistline of the side pattern piece is 12.5cm. Subtract 1.2 to get 11.3. Put this into your equation. 11.3/70* your waist=X. (mine is 13.4.) Add Z and plot a point.


Now connect your points to make a shape that looks like this:


Now we're doing to work on drafting the straps. So move back to the center front and measure 24cm above the bust line. Make a mark. Find your measurement using your bust measurement and 14.4. Subtract 1.4. So 13/88*your bust=X. Add Z for your new ease. From the last mark you drew, measure in that number (15.7 or me) and make another mark. Connect this to the hanging line on the front center piece.


This next part requires a bit of eyeballing, so use your best judgement. A bit further than halfway down the line you just made, make a mark. 

Use your equation, once again disregarding the ease portions. Referring to our book shows us that the strap is 1.5cm away from the line at the deepest point, so 1.5/88*your bust measurement=X. From the last mark you made, plot a point Xcm away from the center front (mine is 1.7). Connect this mark to the highest point, then ad a curved line to connect the lower point to the center front hanging line.


Draw a straight line perpendicular to the bust line connecting the spot where your two pattern pieces connect to the curving line.


You can use your equation for this next part if you want to, but I didn't bother because it's just the straps. Make a mark 5.2cm from the highest point, away from the center front. From this, measure down 3.1cm. and make a diagonal line to the highest shoulder point.

Connect the low shoulder point to the edge of the side piece. Measure up along this line 6.2cm and make a mark.

Now we need to do some more math! Once again disregarding the ease portions, because that isn't an issue when you're taking bits away from the pattern. 5.7 / 88 = .064. Then we take .064 * your bust measurement to get the amount we need to bring the point in. Mine is 6.6. So plot a new point towards the center front, starting at the last mark you made. Make sure this is perpendicular to the center front edge! This point is the deepest your armhole will go.

Now draw a curving line from your strap to the edge of the side pattern piece.

And your second pattern piece is complete! Hooray! Now we're almost done. Erasing the unnecessary marks and lines should give you something that looks like this (don't worry if your straps seem longer than the one here): 

Before we move on to the back piece, we're going to make the front facing. This is a very simple thing to do. Begin by copying the top part of the pattern to a new piece of paper. From the edge of the side seam, measure down 4cm.


Now draw a horizontal line from your mark to the center front, making sure the line meets the front at a 90 degree angle. Congrats, these are your front facing pieces.


We'll start with the larger of the two back pieces.


 Begin by plotting the distance between the waist and the bust lines. In this case  it's 16.5cm.

The waist line for this piece comes in 1cm, which shouldn't be that much different from your own measurements. But use your handy equation to figure it out anyway. So 1/70*your waist measurement (mine is 83)= how far from the edge you need to plot your point (for me it's 1.2).

Now figure out how long the bottom part of the pattern is. The book says 6cm, so.... (6-1.2)/70*your waist measurement + Z = X (for me, 5.7). Plot that point and draw a line.

You should find that this is fairly easy by now. Move up to the bust line and plot the length for that as well. (8.9-1.4)/88*your bust + Z = X. My answer is 9.4. Connect these two lines on both sides.

Now measure up from the bust line 24.5cm and make a mark. Make another mark 2.8cm down from that for your neckline.

From the uppermost mark you're going to draw a line using the same number you got from the previous equation. So for me, it's 9.4 Then connect this line to the lowermost point using a curve. Eyeball this to your best ability. It should be mostly straight for awhile, then curve more drastically upwards.

From the shoulder point, find how far away you need to plot the next point. (5.7-1.4)/88*your bust measurement + Z = X (5.7cm for me). Then plot a point 2cm down from that.

Now draw a diagonal line from the neckline point to the point you just plotted.

From this diagonal line, draw a straight line 8.2cm down.

Before we draw the curve, we're going to work on the next pattern piece. Start at the waist line and plug 2.5 into your equation. Disregard the subtraction and adding Z here. 2.5/70*your waist measurement (83)=X (2.9). Plot a point and connect to the bust line.

I did a bit of math here and found that the pattern piece bottom portion is 13cm. So, using our equation once again... (13-1.2)/70*your waist measurement + Z = X (14.7 for me). So draw a line X cm away from the last point you plotted.

Now move back up to the bust line. Continue this line, using  the number 15.6. (15.6-1.4)/88*your bust measurement +Z = X (I got 17.2). Connect that line to the waist line.

Connect the bust line to the shoulder point using a diagonal line.

Starting from the bust line, measure up the diagonal line 9.2cm and make a mark. Disregarding the subtraction, plot a point from that using the equation with 5.4. 5.4/88*bust measurement (83)=X ( 6.2).

Draw a curved line using that point as a reference. 

Now connect the place where the patterns meet to the highest mark on the armhole.

The back pieces are done! Now all you need to do is make your back facing pieces, which is easy enough, remember?

Measure 10.5cm down the center back from the neckhole, then 4cm down along the line connecting the bust and waist. Draw a curvy line connecting the points and you're done!

IMPORTANT NOTE: None of these pattern pieces include seam allowances, so when you're cutting out your pieces, leave an extra 1/2" to 5/8" along the fabric, otherwise the pieces will be too small after you sew them together.

You should be constantly referring to your book to find the measurements. It can be a little tricky to figure out at first, but the images have everything you need.

Double check the pattern measurements by measuring along each piece's waist and bust line and adding the measurements together. You should get a number an inch or two larger than your measurements

The next thing to do is to 'draft' the skirt portion. This doesn't require an actual pattern piece because the skirt is basically a long rectangle. The usual skirt width in lolita is 3x your waist measurement, though you can increase or decrease this as you feel necessary. 

You now have all the tools you need to resize Otome no Sewing patterns for your body!! You can apply this system to pretty much any pattern in the book. Make sure to make a muslin (or practice version) before using your actual dress pattern so you can address any sizing problems there may be. 

Here is my final product! I changed the skirt because I prefer pleats, but I actually drafted a whole new pattern following this tutorial to insure accuracy. 


All in all, it turned out pretty well. I didn't bother making a muslin this time around so there are a few small fitting issues I'd correct if I made it again, but I'm happy with it.

Anyway, I hope you found this tutorial useful! Happy sewing!